E36 Extended ECU Box Install
Here is an overview on how to install your new ECU box in to E36 chassis using an M54 DME.
Safety first
It’s always a good idea to disconnect battery negative before starting.
If unsure about vehicle systems consult a trained technician.
What you’ll need
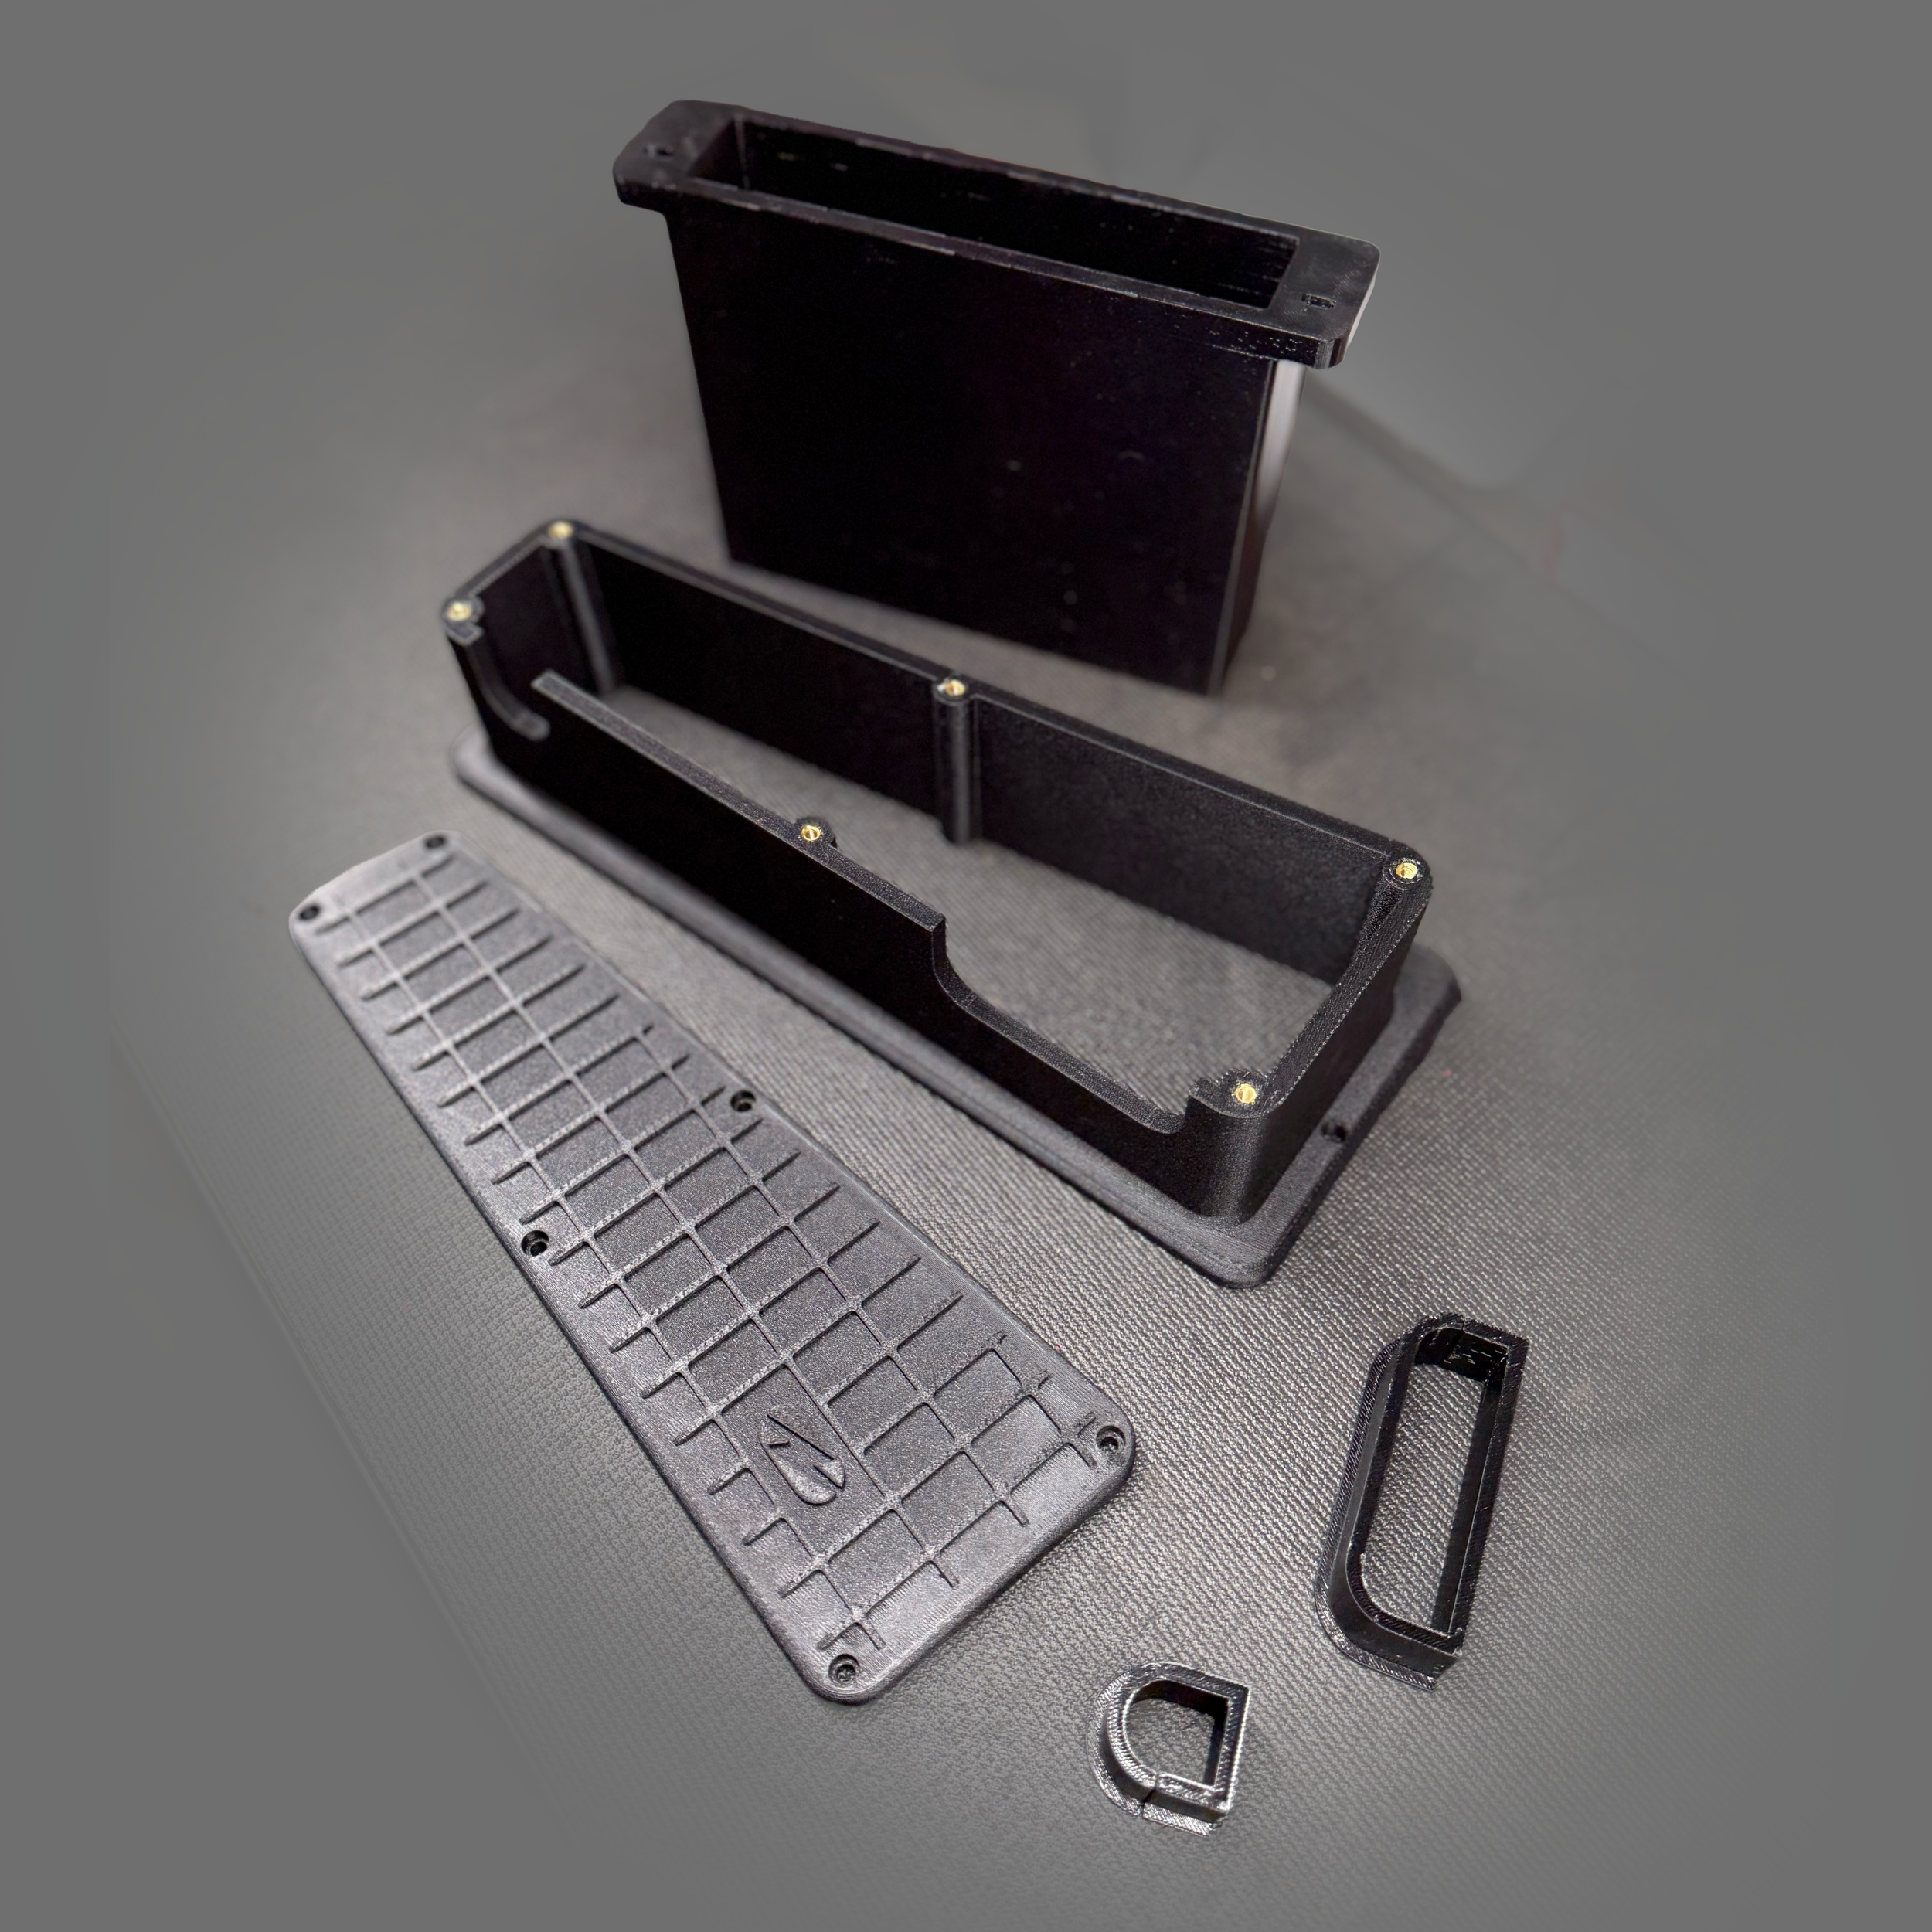
ECU expansion box, TPU grommets, cover & hardware (provided)
New ECU mount (provided) — example: M54 DME mount
Sealant (optional, automotive-grade silicone)
Cable ties, electrical tape, basic hand tools, slightly longer screws if required
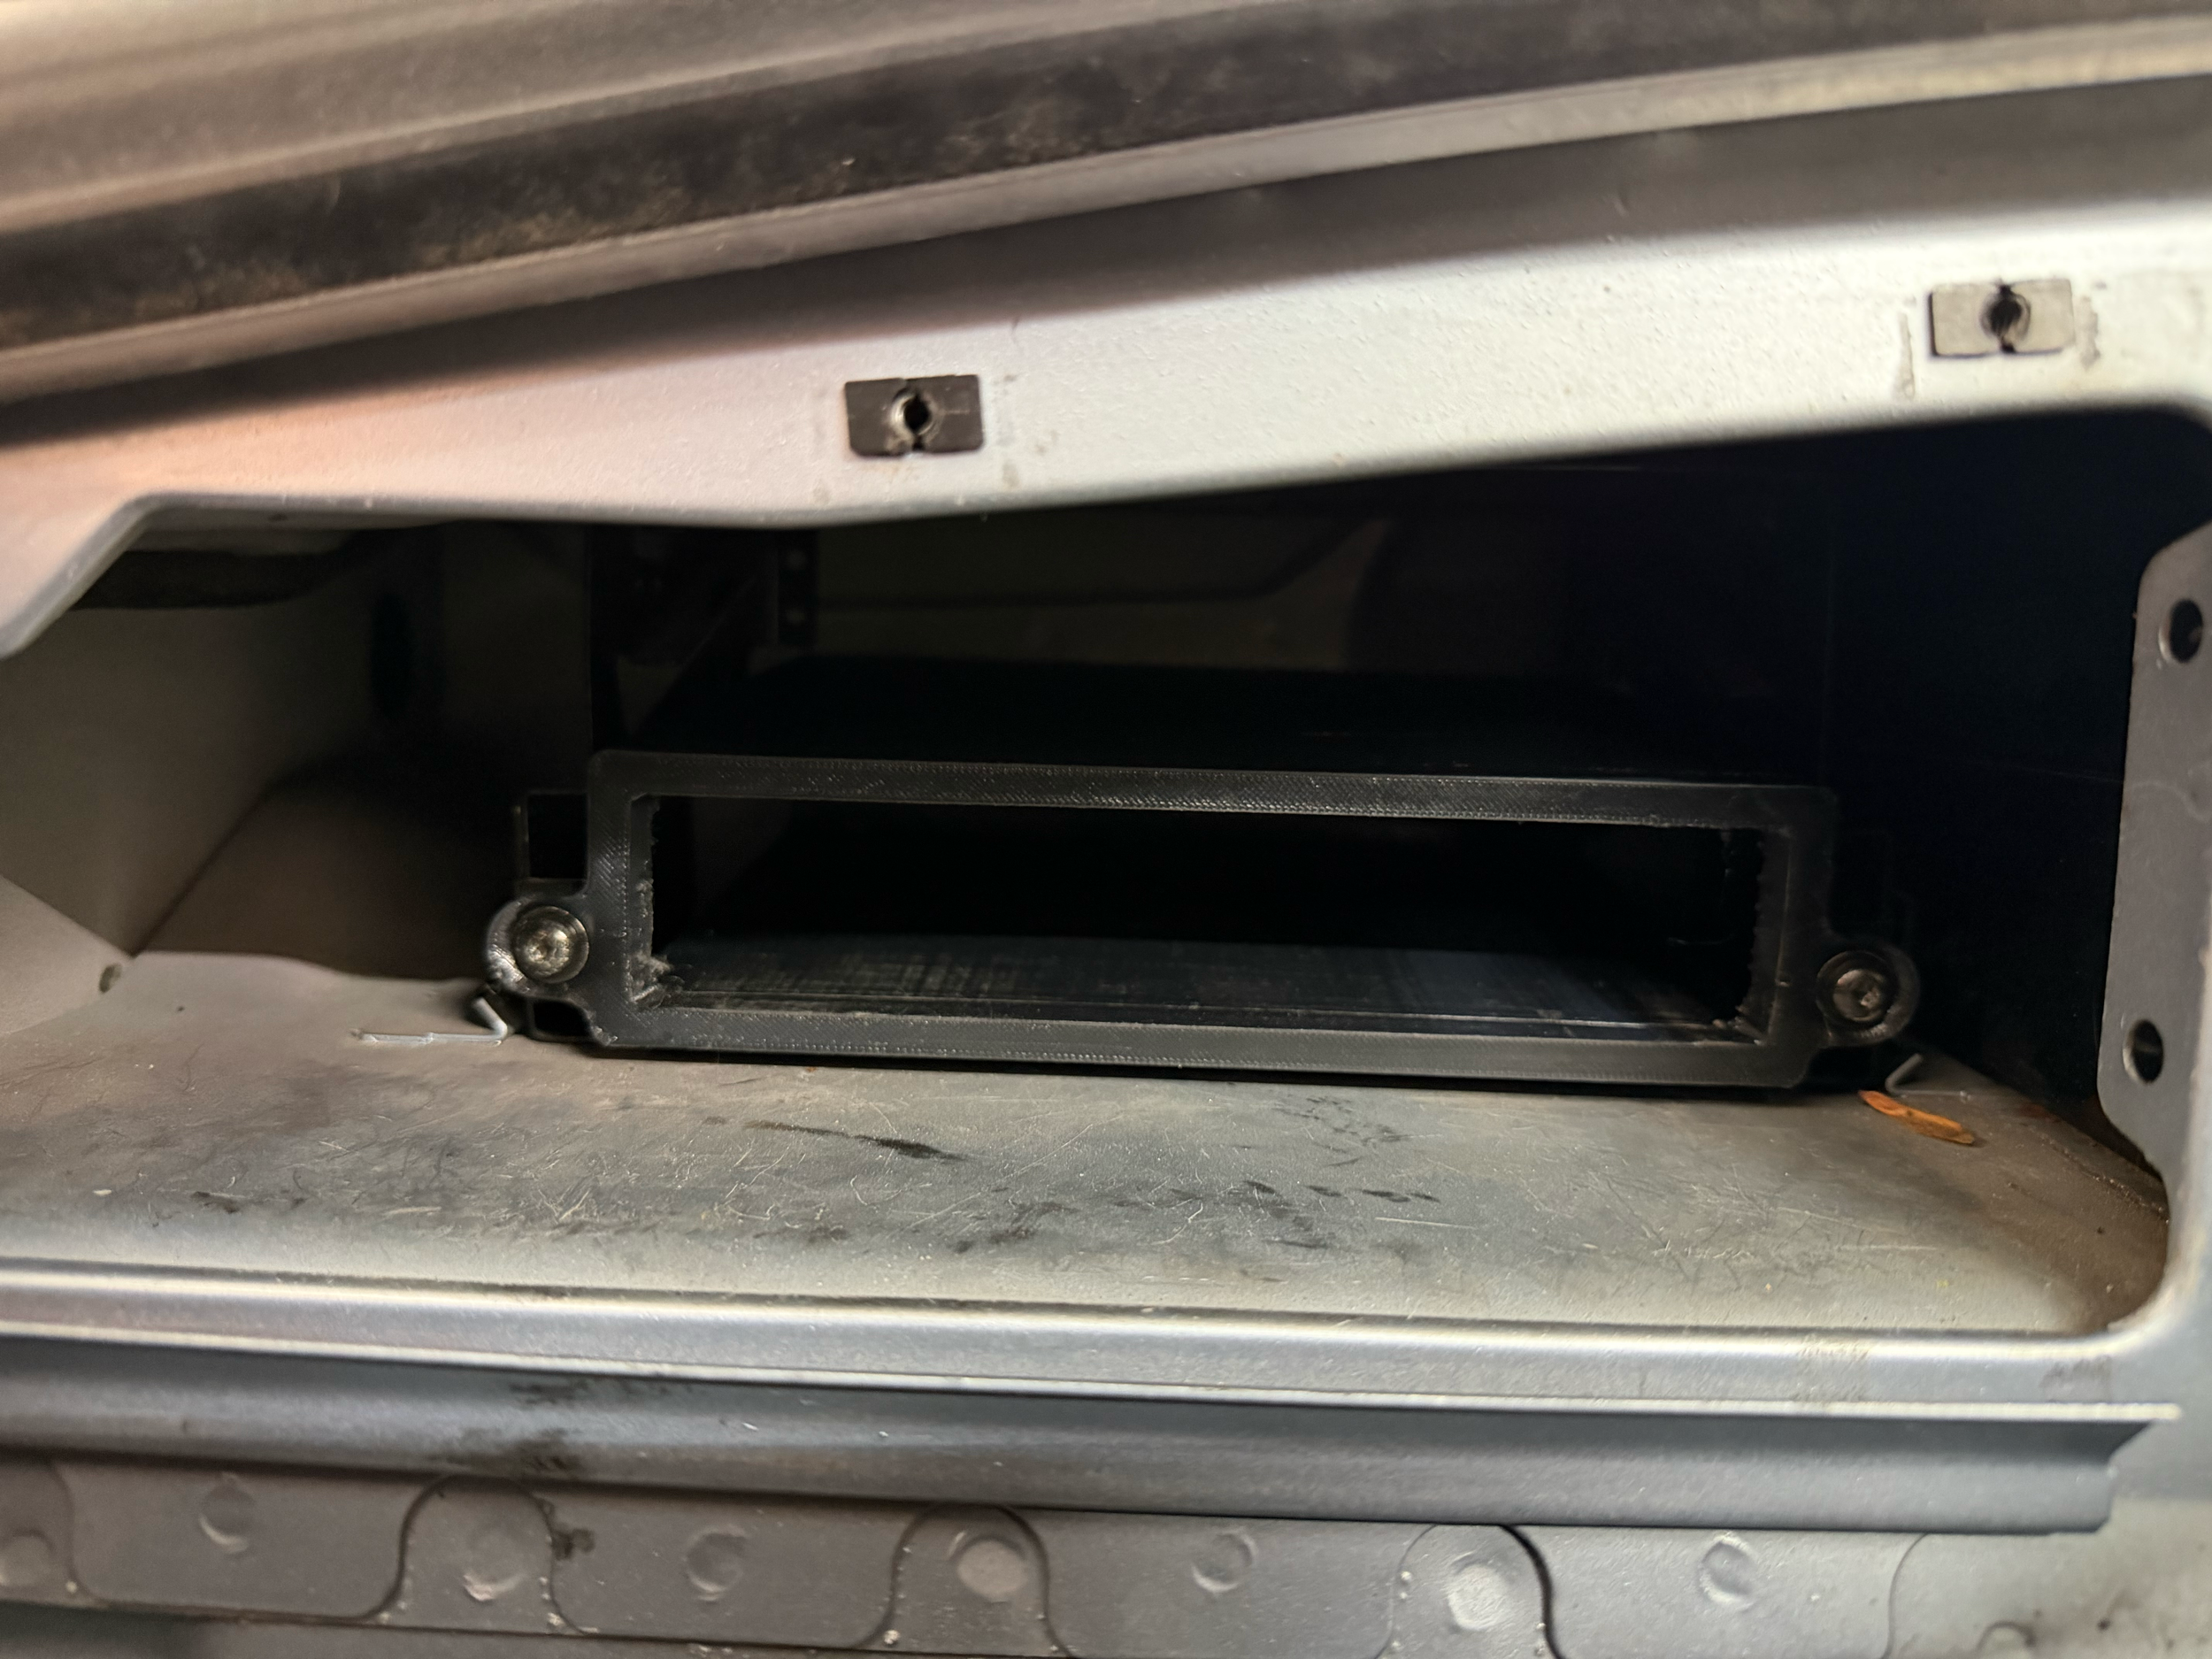
Step 1: Install the ECU mount
Fit the new ECU mount into the factory location. The sleeve should be a snug fit.
If needed, use slightly longer screws to account for thicker mount material.
Tighten screws snugly but do not overtighten — TPU is soft; avoid crushing or deforming the sleeve.
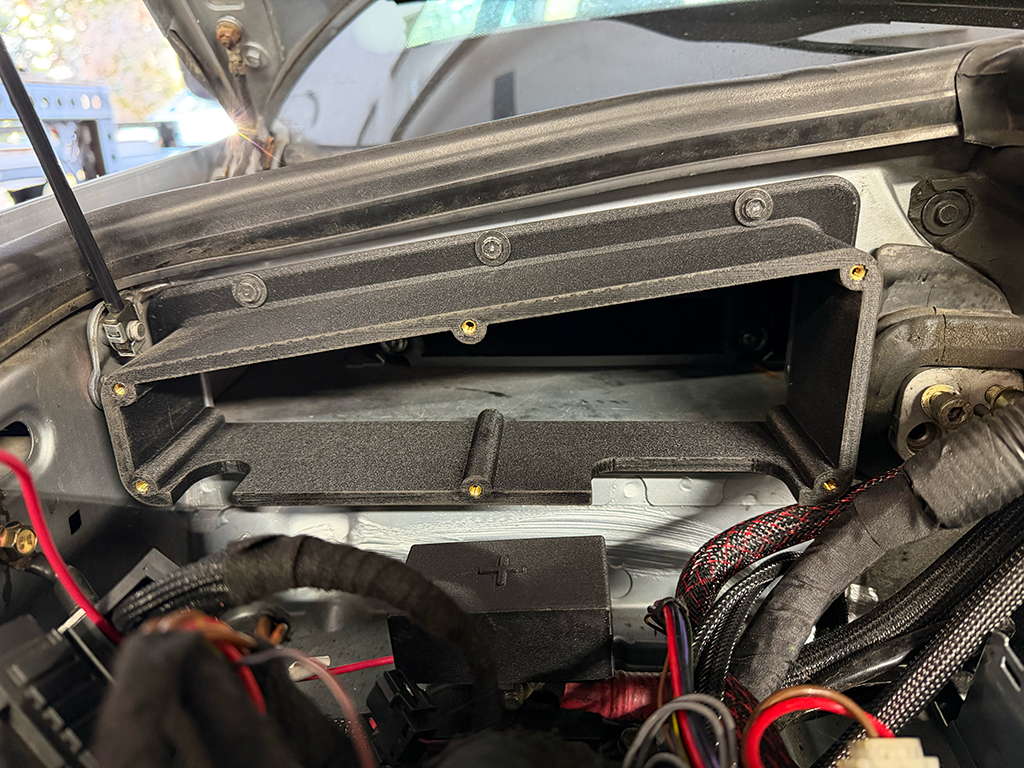
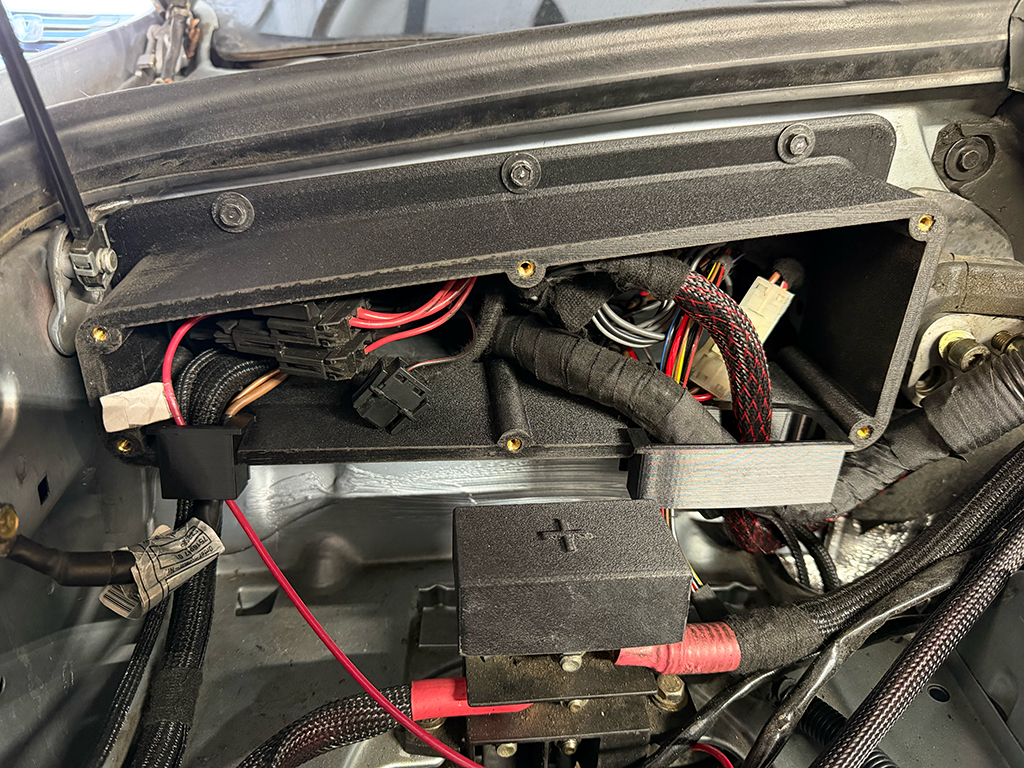
Step 2: Mount the expansion box to the firewall
Engage the lower lip of the box with the firewall, then align the flange.
Secure with 4 screws: 3 on top, 1 on the right side.
Gradually tighten screws in sequence, working around the box to avoid binding. Do not overtorque.
Optional (harsh use): apply a thin bead of automotive-grade sealant where the flange meets the firewall.
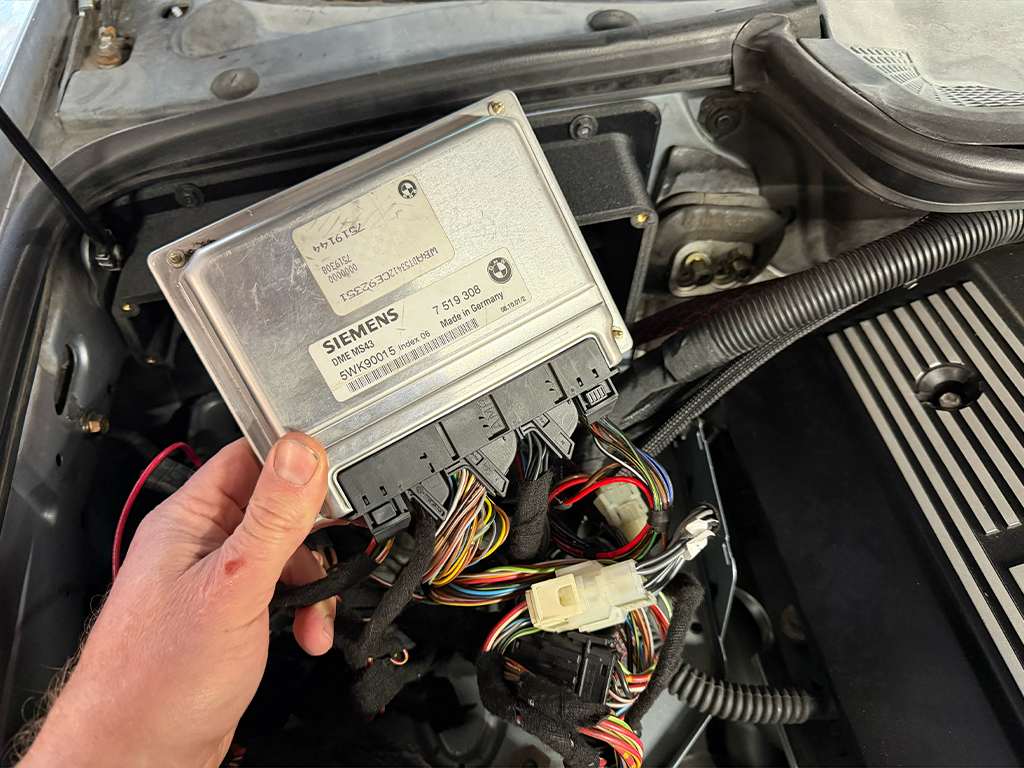
Step 3: Prepare the ECU and wiring
Lay out all harnesses/adapters and remove major tangles.
Use cable ties or tape to neatly group wires; leave serviceable slack.
Plug all connectors into the ECU and verify full engagement.
Step 4: Install ECU into the mount
Gently slide the ECU into the new mount until seated.
Route excess wiring into the box through the provided ports. Use the provided TPU grommets in each port to protect wires from abrasion.
Example: we used the smaller left-side port for accessory wiring and the ground where no internal ground point existed.

Step 5: Install the cover / Final checks
Seat the cover firmly against the box, aligning all holes.
Install bolts gradually, alternating around the cover and snugging them evenly. Do not overforce or overtighten — printed nylon can crack under excessive torque.
Optional (harsh use): place a small amount of sealant between cover flange and box before final torquing to improve weather resistance.
Ensure grommets fully seated and no wires are pinched.
Confirm cover is flush and all fasteners are snug.
Reconnect battery negative.
Power up vehicle and verify ECU communication and functionality per your tuning/diagnostic procedure.
Troubleshooting & tips
If ECU won’t seat: check for misplaced connectors or excessive cable bundles.
If moisture ingress is a concern for severe environments, use recommended sealant sparingly and inspect periodically.
Use low-profile cable ties and route wires away from heat sources and moving parts.
Torque guidance: snug by hand and avoid impact tools.
Uninstall / service access
Disconnect battery negative.
Remove cover bolts and lift cover off.
Carefully pull ECU out of mount, supporting connectors.
Reverse install steps for reassembly.
Enjoy your cleaner engine bay and safe install!